There are quite a few options for sharing your location via APRS. You can go complete internet with applications like APRSDroid, you can purchase a radio such as the Kenwood TM-D710GA, Yeasu FTM-300DR or FTM-400XDR with integrated APRS functionality or you can setup a dedicated radio just for APRS.
To top it off, there are competing digital standards. While APRS seems to be the winning standard, you also have the Icom GPS location sharing which is part of the D-Star standard. To submit Icom GPS to the https://aprs.fi/ site, you need to use a special D-PRS gateway to convert the Icom GPS format into APRS format.
It’s really a shame there are so many incompatible competing standards. It reminds me of what happened with instant messaging applications. In order to communicate with various friends and family, you inevitably either run several messaging programs or use an all-in-one program like Trillian (at least until one chat program gets locked down or something). DMR, YFS and D-Star remind me of that same scenario.
There are APRS options out there like Byonics that offer dedicated APRS functionality. They aren’t necessarily expensive and are typically lower power. If you’re out in the woods or in the desert, lower power may not be your friend for getting critical location information out there.
In my exploration of options, I came across Mobilinkd. This is a simple TNC that can be used with cell phones and other devices. The idea is that your cell phone connects via Bluetooth to deliver GPS location information to the Mobilinkd TNC. The TNC then uses an audio connection to a radio to broadcast this information to be picked-up via an APRS gateway.
The team at Mobilinkd has gone out of their way to provide some information related to hacking legacy radios to work. I’m thinking there are other radios out there besides what’s on their site but what they provide is what they know works.
I took the option of trying their TK-790 hack. Mobilinkd sells a ready-to-go radio on their site but I opted for the whole experience and purchased a radio off eBay. You can find all kinds of deals out there. Just be sure to stick to the guide and check FCC IDs. I was lucky and found a radio that included a hand mic. I didn’t really care about anything else other than it was guaranteed working. Having the hand mic made testing much easier. Once I got it all going, I was able to key the mic and verify transmit by using simplex into a load and listening on my handheld.
The how-to guide linked from the Mobilinkd site is pretty thorough. I opted to go a slightly different route with the programming cable though. I do have a 3D printer so I could have printed the adapter and purchased the pogo pins. What I found though was by removing the control head, I could access the programming wires and connect them to the programming serial port using two unused/reserved wires.
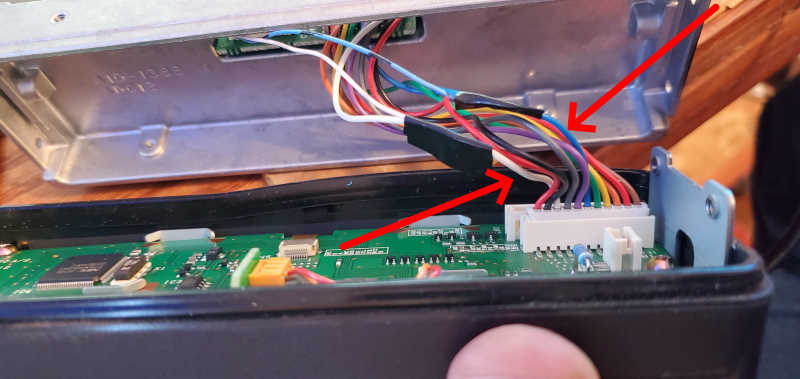
Let’s start with the control head. The connections referenced in the article about connecting using the mic connection are the TRD and ground connections. I verified that the blue and white wires are what I needed to make that work. I was able to use my meter and verify the “E” wire was indeed earth ground and was connected to the chassis.

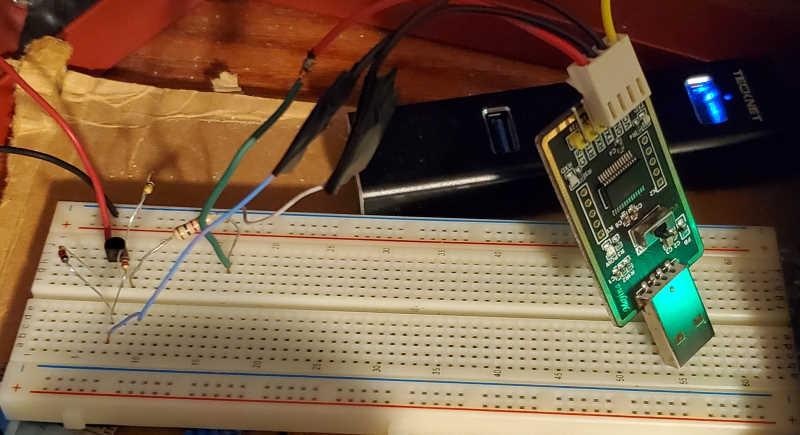
After identifying the wires, I stripped some insulation and clipped onto the wires and tested programming. I build the USB serial setup just as described in the Mobilinkd article. I was able to program the US APRS frequency of 144.390 MHz on low power and high power. I also programmed our local club repeater so I could have a backup in case there was an issue with my main radio. Top it off with a weather station and we’re good to go!
What I did then was to mid-strip the wires and solder a 24ga solid core jumper wire then tape it up. I could have cut the wires and slipped some heat shrink over it but I couldn’t find my heat shrink. Thinking back on it, I probably could have removed the wires from the connector on the face plate. Leaving it all in place though leaves the possibility of using a mic connection based programming cable later.
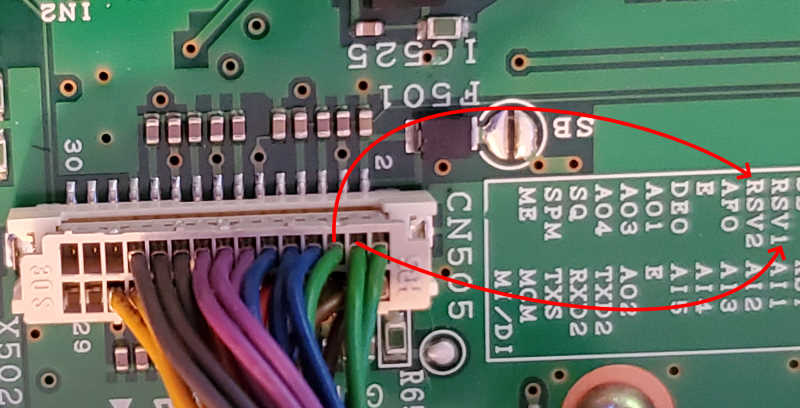
Next, I located 2 wires on the rear serial port that weren’t being used. According to this PDF, connections 15 and 16 were “reserved”. I figured since I wasn’t doing anything extravagant with the serial connection, those connections wouldn’t be missed. I was able to pull the connections from the main board connection, cut the end and solder to my 24ga jumper wires that I had just soldered to the front control unit. Excuse the tape, I still couldn’t find my heat shrink. Both wires are green so make sure to keep everything straight. If you forget, you can always check each one for ground to verify. The “E” ground wire should register to ground but the “TRD” wire shouldn’t.
Here we are all setup and ready to close.
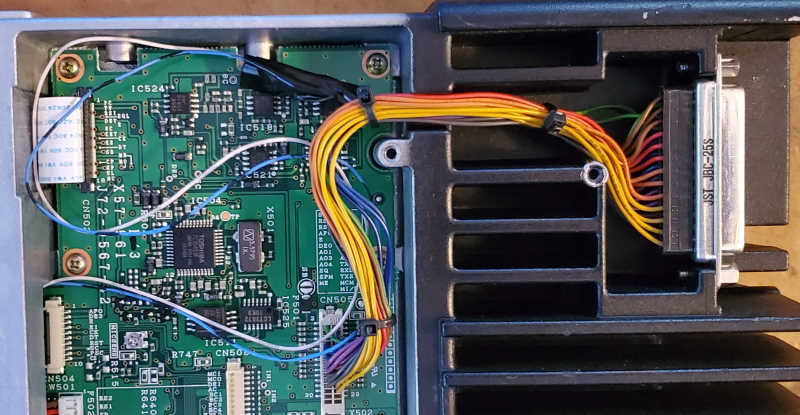
Next was to build a DB-25 setup. I started by putting the programming wires and the connections for the Mobilinkd TNC all on the same connector. I’ll remove the programming wires and repurpose an old Cisco DB-25 to RJ45 adapter or something. I don’t foresee needing to program anytime soon now that I’m all setup but would like to have a plan just in case.
Next steps are to link the TNC to a Pi 3B+ with a GPS installed. The idea is to use the Pi instead of my cell phone for the GPS data. My hope is this will give me more flexibility in the future. I can use the Pi as my mobile MMDVM D-Star hotspot or maybe as a terminal of some sort. That may be where the programming cable comes in next.